How to Build a Multiplayer (.io) Web Game, Part 1
A deep dive into the client-side Javascript of an .io game.
| UPDATED
2022 Update: thank you all for tremendous support this guide has received! I’ve modernized some of the code and content in this post. Happy developing 😊
When Agar.io came out in 2015, it inspired a new .io game genre that has since exploded in popularity. I experienced the rise of .io games firsthand: I’ve built and sold 2 .io games in the past 3 years.
In case you’ve never heard of .io games before: they’re free, multiplayer web games that are easy to join (no account required) and usually pit many players against each other in one arena. Other famous .io games include Slither.io and Diep.io.
In this post, we’re going to understand how to build an .io game from scratch. All you need is a working knowledge of Javascript: you should be comfortable with things like ES6 syntax, the this keyword, and Promises. Even if you’re not the most familiar with Javascript, you should still be able to get through most of this post.
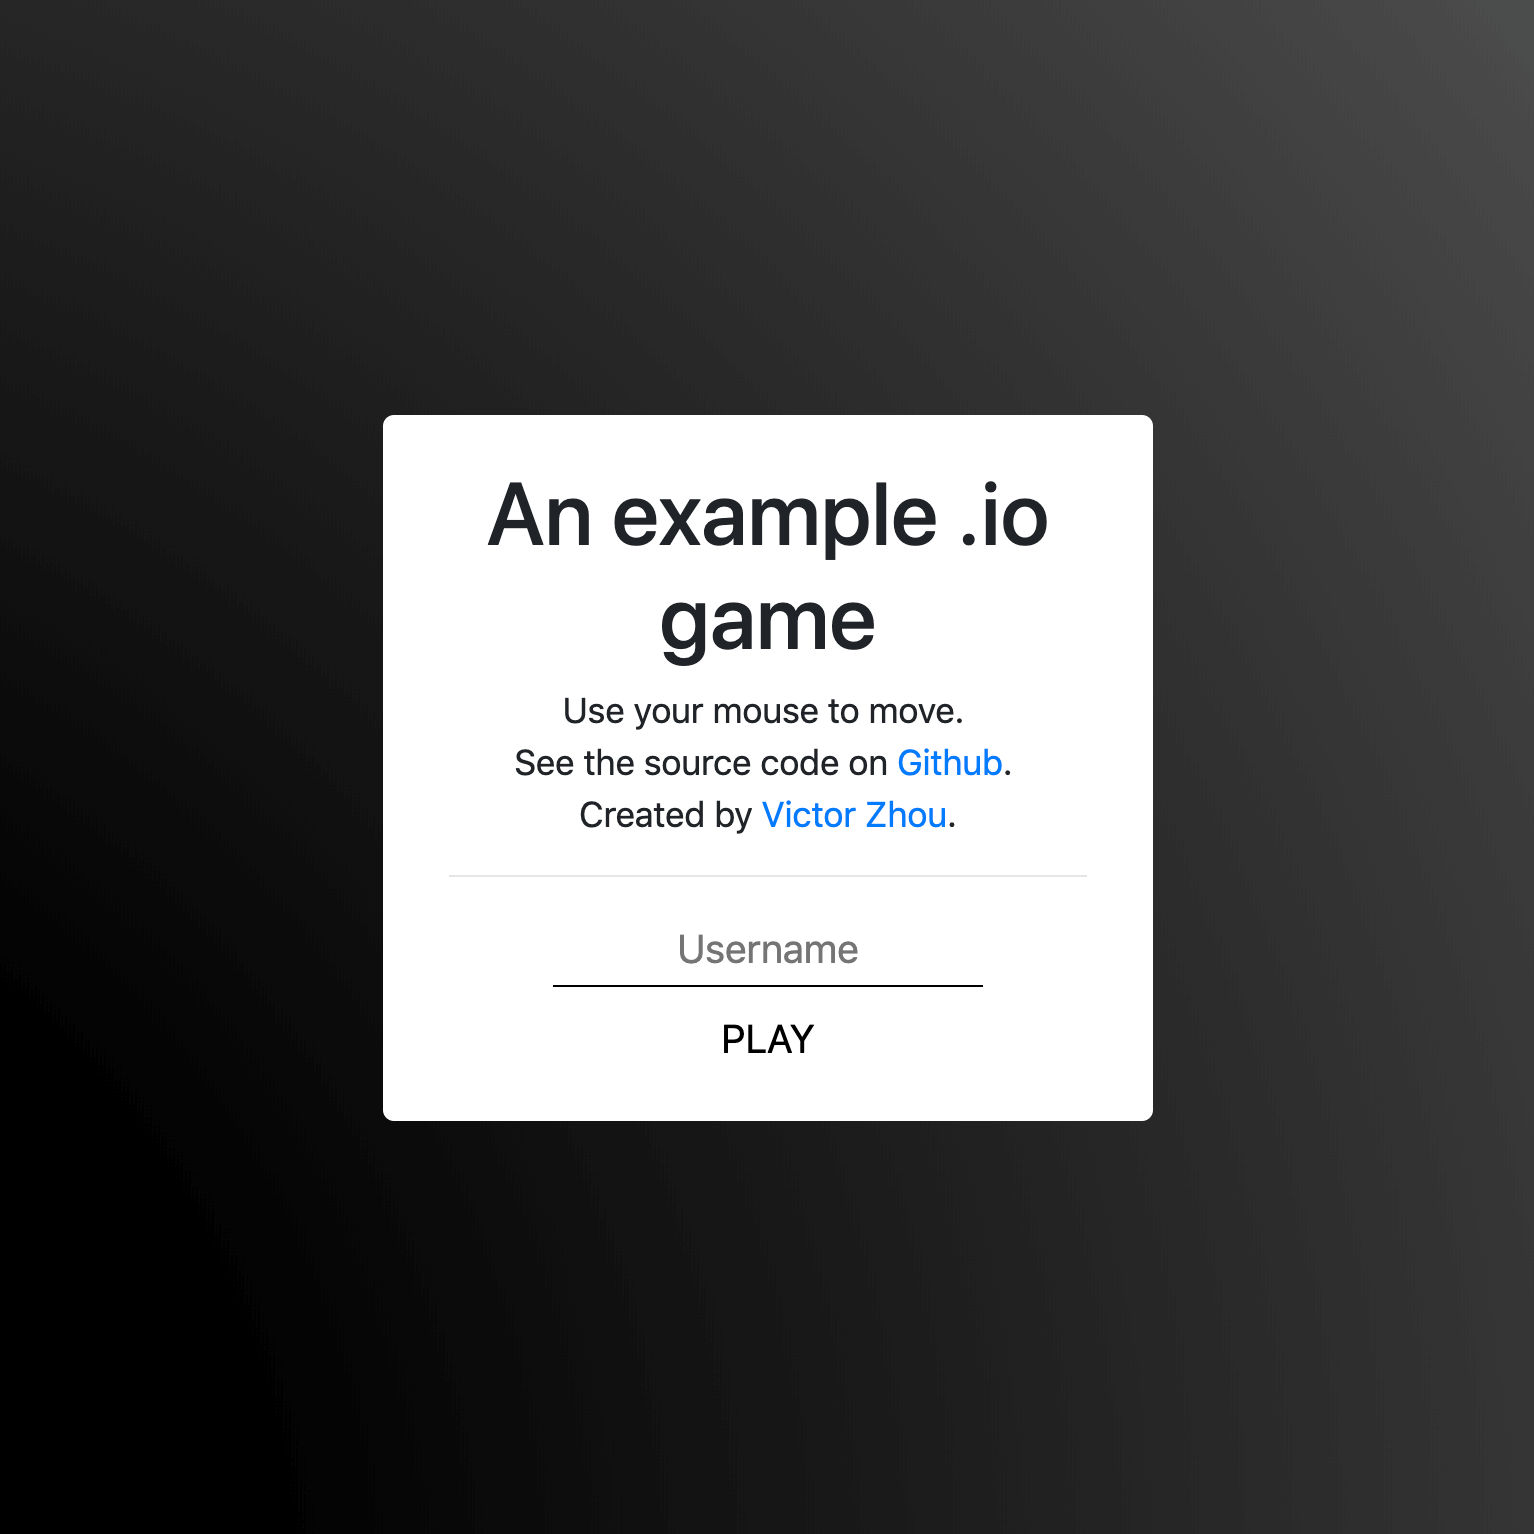
An Example .io Game
To help us learn, we’re going to be referencing the example .io game embedded below. Go ahead, try it out! You can play it right here on this page:
It’s a pretty simple game: you control a ship in an arena with other players. Your ship automatically fires bullets, and you’re trying to hit other players with your bullets while avoiding theirs.
Table of Contents
This is Part 1 of a two-part series. Here’s what we’ll cover in this post:
- Project Overview / Structure: A high level view of the project.
- Builds / Project Setup: Development tooling, configuration, and setup.
- Client Entrypoints:
index.htmlandindex.js. - Client Networking: Communicating with the server.
- Client Rendering: Downloading image assets + Rendering the game.
- Client Input: Letting users actually play the game.
- Client State: Processing game updates from the server.
We’ll go over the Server in Part 2.
1. Project Overview / Structure
I recommend downloading the source code for the example game so you can follow along.
Our example game uses:
- Express, the most popular web framework for Node.js, to power its web server.
- socket.io, a websocket library, to communicate between the browser and the server.
- Webpack, a module bundler. Read more about why you should use Webpack.
Here’s what the project directory structure look like:
public/
    assets/
        ...
src/
    client/
        css/
            ...
        html/
            index.html
        index.js
        ...
    server/
        server.js
        ...
    shared/
        constants.js
public/
Anything in the public/ folder will be statically served by our server. public/assets/ contains images used by our project.
src/
All the source code is in the src/ folder. client/ and server/ are pretty self explanatory, and shared/ contains a constants file that’s imported by both the client and the server.
2. Builds / Project Setup
As mentioned before, we’re using the Webpack module bundler to build our project. Let’s take a look at our Webpack configuration:
// header: webpack.common.js
const path = require('path');
const MiniCssExtractPlugin = require('mini-css-extract-plugin');

module.exports = {
  entry: {
    game: './src/client/index.js',  },
  output: {
    filename: '[name].[contenthash].js',    path: path.resolve(__dirname, 'dist'),  },
  module: {
    rules: [
      {
        test: /\.js$/,
        exclude: /node_modules/,
        use: {
          loader: "babel-loader",
          options: {
            presets: ['@babel/preset-env'],          },
        },
      },
      {
        test: /\.css$/,
        use: [
          {
            loader: MiniCssExtractPlugin.loader,
          },
          'css-loader',
        ],
      },
    ],
  },
  plugins: [
    new MiniCssExtractPlugin({
      filename: '[name].[contenthash].css',    }),
    new HtmlWebpackPlugin({
      filename: 'index.html',
      template: 'src/client/html/index.html',
    }),
  ],
};
A few key lines are highlighted above:
src/client/index.jsis the Javascript (JS) client entrypoint. Webpack will start there and recursively look for other files that are imported.- The JS output of our Webpack build will be placed in the
dist/directory. I’ll refer to this file as our JS bundle. - We’re using Babel, specifically the @babel/preset-env config, to transpile our JS code for older browsers.
- We’re using a plugin to extract all CSS referenced by our JS files and bundle it together. I’ll refer to this as our CSS bundle.
You may have noticed the strange '[name].[contenthash].ext' bundle filenames. They include Webpack filename substitutions: [name] will be replaced with the entrypoint name (which is game), and [contenthash] will be replaced with a hash of the file contents. We do this to optimize for caching - we can tell browsers to cache our JS bundles forever, because if the bundle changes its filename will change, too (the contenthash changes). The final result is a filename like game.dbeee76e91a97d0c7207.js.
The webpack.common.js file is a base config file that we import in our development and production configurations. For example, here’s the development config:
// Header: webpack.dev.js
const merge = require('webpack-merge');
const common = require('./webpack.common.js');

module.exports = merge(common, {
  mode: 'development',
});
We use webpack.dev.js for efficiency while developing, and we switch to webpack.prod.js to optimize bundle sizes when deploying to production.
Local Setup
I recommend installing the project on your local machine so you can follow along with the rest of this post. Setup is simple: first, make sure you have Node and NPM installed. Then,
$ git clone https://github.com/vzhou842/example-.io-game.git
$ cd example-.io-game
$ npm install
and you’re ready to go! To run the development server, simply
$ npm run developand visit localhost:3000 in your web browser. The dev server will automatically rebuild the JS and CSS bundles when you edit code - just refresh to see your changes!
3. Client Entrypoints
Let’s get to the actual game code. To start, we need an index.html page, which is the first thing your browser loads when it visits a site. Ours will be pretty simple:
// Header: index.html
<!DOCTYPE html>
<html>
<head>
  <title>An example .io game</title>
  <link type="text/css" rel="stylesheet" href="/game.bundle.css">
</head>
<body>
  <canvas id="game-canvas"></canvas>
  <script async src="/game.bundle.js"></script>
  <div id="play-menu" class="hidden">
    <input type="text" id="username-input" placeholder="Username" />
    <button id="play-button">PLAY</button>
  </div>
</body>
</html>We have:
- An HTML5 Canvas (
<canvas>) element that we’ll use to render the game. - A
<link>include for our CSS bundle. - A
<script>include for our Javascript bundle. - The main menu, with a username
<input>and a “PLAY”<button>.
Once the homepage is loaded in your browser, our Javascript code will start executing, beginning with our JS entrypoint file: src/client/index.js.
// Header: index.js
import { connect, play } from './networking';
import { startRendering, stopRendering } from './render';
import { startCapturingInput, stopCapturingInput } from './input';
import { downloadAssets } from './assets';
import { initState } from './state';
import { setLeaderboardHidden } from './leaderboard';

import './css/main.css';

const playMenu = document.getElementById('play-menu');
const playButton = document.getElementById('play-button');
const usernameInput = document.getElementById('username-input');

Promise.all([
  connect(),
  downloadAssets(),
]).then(() => {
  playMenu.classList.remove('hidden');
  usernameInput.focus();
  playButton.onclick = () => {
    // Play!
    play(usernameInput.value);
    playMenu.classList.add('hidden');
    initState();
    startCapturingInput();
    startRendering();
    setLeaderboardHidden(false);
  };
});
This might seem complicated, but there’s actually not that much going on here:
- Import a bunch of other JS files.
- Import some CSS (so Webpack knows to include it in our CSS bundle).
- Run
connect()to establish a connection to the server, and rundownloadAssets()to download the images we need to render the game. - Once step 3 has finished, display the main menu (
playMenu). - Setup a click handler for the “PLAY” button. If clicked, initialize the game and tell the server we’re ready to play.
The meat of our client-side logic resides in those other files that are imported by index.js. We’ll go through each of those next.
4. Client Networking
For this game, we’ll use the well-known socket.io library to communicate with the server. Socket.io includes built-in support for WebSockets, which are great for two-way communication: we can send messages to the server and the server can send messages to us over the same connection.
We’ll have one file, src/client/networking.js, that takes care of all communication with the server:
// Header: networking.js
import io from 'socket.io-client';
import { processGameUpdate } from './state';

const Constants = require('../shared/constants');

const socket = io(`ws://${window.location.host}`);
const connectedPromise = new Promise(resolve => {
  socket.on('connect', () => {
    console.log('Connected to server!');
    resolve();
  });
});

export const connect = onGameOver => (
  connectedPromise.then(() => {
    // Register callbacks
    socket.on(Constants.MSG_TYPES.GAME_UPDATE, processGameUpdate);
    socket.on(Constants.MSG_TYPES.GAME_OVER, onGameOver);
  })
);

export const play = username => {
  socket.emit(Constants.MSG_TYPES.JOIN_GAME, username);
};

export const updateDirection = dir => {
  socket.emit(Constants.MSG_TYPES.INPUT, dir);
};3 major things happen in this file:
- We try to connect to the server.
connectedPromiseonly resolves once we’ve established a connection. - If the connection succeeds, we register callbacks (
processGameUpdate()andonGameOver()) for messages we might receive from the server. - We export
play()andupdateDirection()for other files to use.
5. Client Rendering
Time to make stuff show up on screen!
…but before we can do that, we must download all the images (assets) we need to do so. Let’s write an Assets manager:
// Header: assets.js
const ASSET_NAMES = ['ship.svg', 'bullet.svg'];

const assets = {};
const downloadPromise = Promise.all(ASSET_NAMES.map(downloadAsset));

function downloadAsset(assetName) {
  return new Promise(resolve => {
    const asset = new Image();
    asset.onload = () => {
      console.log(`Downloaded ${assetName}`);
      assets[assetName] = asset;
      resolve();
    };
    asset.src = `/assets/${assetName}`;
  });
}

export const downloadAssets = () => downloadPromise;
export const getAsset = assetName => assets[assetName];
Managing assets isn’t so hard to implement! The main idea is to keep an assets object that maps a filename key to an Image object value. When an asset is finished downloading, we save it to the assets object for easy retrieval later. Finally, once each individual asset download has resolved (meaning all assets have been downloaded), we resolve downloadPromise.
With downloading assets out of the way, we can move on to rendering. As mentioned earlier, we’re using an HTML5 Canvas (<canvas>) to draw to our webpage. Our game is pretty simple, so all we need to draw is:
- The background
- Our player’s ship
- Other players in the game
- Bullets
Here are the important parts of src/client/render.js, which draws exactly those 4 things I listed above:
// Header: render.js
import { getAsset } from './assets';
import { getCurrentState } from './state';

const Constants = require('../shared/constants');
const { PLAYER_RADIUS, PLAYER_MAX_HP, BULLET_RADIUS, MAP_SIZE } = Constants;

// Get the canvas graphics context
const canvas = document.getElementById('game-canvas');
const context = canvas.getContext('2d');

// Make the canvas fullscreen
canvas.width = window.innerWidth;
canvas.height = window.innerHeight;

function render() {
  const { me, others, bullets } = getCurrentState();
  if (me) {
    // Draw background
    renderBackground(me.x, me.y);

    // Draw all bullets
    bullets.forEach(renderBullet.bind(null, me));

    // Draw all players
    renderPlayer(me, me);
    others.forEach(renderPlayer.bind(null, me));
  }

  // Rerun this render function on the next frame
  animationFrameRequestId = requestAnimationFrame(render);
}

// ... Helper functions here excluded

let animationFrameRequestId;

// Replaces main menu rendering with game rendering.
export function startRendering() {
  animationFrameRequestId = requestAnimationFrame(render);
}

// Replaces game rendering with main menu rendering.
export function stopRendering() {
  cancelAnimationFrame(animationFrameRequestId);
}render() is the primary function of this file. startRendering() and stopRendering() control activation of the render loop, which uses requestAnimationFrame to rerender when necessary.
The specific implementations of the individual render helper functions (e.g. renderBullet()) are not as important, but here’s one simple example:
// Header: render.js
function renderBullet(me, bullet) {
  const { x, y } = bullet;
  context.drawImage(
    getAsset('bullet.svg'),
    canvas.width / 2 + x - me.x - BULLET_RADIUS,
    canvas.height / 2 + y - me.y - BULLET_RADIUS,
    BULLET_RADIUS * 2,
    BULLET_RADIUS * 2,
  );
}
Notice how we’re using the getAsset() method we saw earlier from asset.js!
Read the rest of src/client/render.js if you’re interested in seeing the other render helper functions.
6. Client Input 🕹️
It’s time to make the game playable! Our control scheme is very simple: use the mouse (on desktop) or touch the screen (on mobile) to control the direction of movement. To do this, we’ll register Event Listeners for Mouse and Touch events.
src/client/input.js takes care of it all:
// Header: input.js
import { updateDirection } from './networking';

function onMouseInput(e) {
  handleInput(e.clientX, e.clientY);
}

function onTouchInput(e) {
  const touch = e.touches[0];
  handleInput(touch.clientX, touch.clientY);
}

function handleInput(x, y) {
  const dir = Math.atan2(x - window.innerWidth / 2, window.innerHeight / 2 - y);
  updateDirection(dir);
}

export function startCapturingInput() {
  window.addEventListener('mousemove', onMouseInput);
  window.addEventListener('touchmove', onTouchInput);
}

export function stopCapturingInput() {
  window.removeEventListener('mousemove', onMouseInput);
  window.removeEventListener('touchmove', onTouchInput);
}onMouseInput() and onTouchInput() are Event Listeners that call updateDirection() (from networking.js) when an input event happens (e.g. the mouse moves). updateDirection() takes care of messaging the server, which handles the input event and updates the game state accordingly.
7. Client State
This section is the most advanced one in this post. Don’t be discouraged if you don’t understand everything on the first readthrough! Feel free to skip this section and come back to it later, too.
The last piece of the puzzle we need to complete the client-side code is the state. Remember this bit of code from the Client Rendering section?
// Header: render.js
import { getCurrentState } from './state';

function render() {
  const { me, others, bullets } = getCurrentState();
  // Do the rendering
  // ...
}getCurrentState() must be able to give us the client’s current game state at any point in time based on game updates received from the server. Here’s an example game update the server might send:
{
  "t": 1555960373725,
  "me": {
    "x": 2213.8050880413657,
    "y": 1469.370893425012,
    "direction": 1.3082443894581433,
    "id": "AhzgAtklgo2FJvwWAADO",
    "hp": 100
  },
  "others": [],
  "bullets": [
    {
      "id": "RUJfJ8Y18n",
      "x": 2354.029197099604,
      "y": 1431.6848318262666
    },
    {
      "id": "ctg5rht5s",
      "x": 2260.546457727445,
      "y": 1456.8088728920968
    }
  ],
  "leaderboard": [
    {
      "username": "Player",
      "score": 3
    }
  ]
}
Each game update has these same 5 fields:
- t: The server timestamp at which this update was created.
- me: The player info for the player receiving the update.
- others: An array of player info for other players in the same game.
- bullets: An array of bullet info for bullets in the game.
- leaderboard: The current leaderboard data. We’re ignoring this for this post.
7.1 Naive Client State
A naive implementation of getCurrentState() could just directly return the data from the most recently received game update.
// Header: naive-state.js
let lastGameUpdate = null;

// Handle a newly received game update.
export function processGameUpdate(update) {
  lastGameUpdate = update;
}

export function getCurrentState() {
  return lastGameUpdate;
}
Nice and clean! If only it were that easy. One reason this implementation is problematic is because it limits the render frame rate to the server tick rate.
Frame Rate: The number of frames (i.e.
render()calls) per second, or FPS. Games generally target at least 60 FPS.
Tick Rate: The rate at which the server sends game updates to clients. This is often lower than the frame rate. For our game, the server operates at 30 ticks per second.
If we just render the most recent game update, our effective FPS cannot exceed 30 because we’ll never receive more then 30 updates per second from the server. Even if we call render() 60 times per second, half of those calls would just redraw the exact same thing, effectively doing nothing.
Another problem with the naive implementation is that it’s prone to lag. Under perfect internet conditions, the client would receive a game update exactly every 33 ms (30 per second):

Sadly, nothing is ever that perfect. A more realistic representation might look like this:

The naive implementation is pretty much the worst case scenario when it comes to lag. If a game update arrives 50 ms late, the client freezes for an extra 50 ms because it’s still rendering the game state of the previous update. You can imagine how that’d be a bad experience for the player: the game would be jittery and feel unstable because it randomly freezes.
7.2 Better Client State
We’ll make a few simple improvements to the naive implementation. The first is to use a render delay of 100 ms, meaning the “current” client state will always be 100 ms behind the server’s game state. For example, if the server is at time 150, the state rendered on the client will be what the server state was at time 50:

This gives us a 100 ms buffer to tolerate unpredictable game update arrivals:

The cost of doing this is a constant 100 ms input lag. That’s a small price to pay to have consistent, smooth gameplay - the majority of players (especially casual players) won’t even notice the delay. It’s much easier for humans to adjust to a constant 100 ms lag than try to play with unpredictable lag.
There’s a different technique we can use called client-side prediction that’s good at reducing perceived lag, but that’s outside of the scope of this post.
The other improvement we’ll make is to use linear interpolation. Because of the render delay, we’ll usually already have at least 1 update ahead of current client time. Whenever getCurrentState() is called, we can linearly interpolate between the game updates immediately before and after current client time:

This solves our frame rate problem: we can now render unique frames as often as we want!
7.3 Implementing Better Client State
The example implementation in src/client/state.js uses both a render delay and linear interpolation, but it’s a little long. Let’s break it down into parts. Here’s the first:
// Header: state.js, Part 1
const RENDER_DELAY = 100;

const gameUpdates = [];
let gameStart = 0;
let firstServerTimestamp = 0;

export function initState() {
  gameStart = 0;
  firstServerTimestamp = 0;
}

export function processGameUpdate(update) {
  if (!firstServerTimestamp) {
    firstServerTimestamp = update.t;
    gameStart = Date.now();
  }
  gameUpdates.push(update);

  // Keep only one game update before the current server time
  const base = getBaseUpdate();
  if (base > 0) {
    gameUpdates.splice(0, base);
  }
}

function currentServerTime() {
  return firstServerTimestamp + (Date.now() - gameStart) - RENDER_DELAY;
}

// Returns the index of the base update, the first game update before
// current server time, or -1 if N/A.
function getBaseUpdate() {
  const serverTime = currentServerTime();
  for (let i = gameUpdates.length - 1; i >= 0; i--) {
    if (gameUpdates[i].t <= serverTime) {
      return i;
    }
  }
  return -1;
}
The first thing to understand is what currentServerTime() does. As we saw before, every game update includes a server timestamp. We want to use a render delay to render 100 ms behind the server, but we’ll never know what the current time is on the server because we can’t know how long it took for any given update to arrive. The internet is unpredictable and can vary widely!
To get around this issue, we’ll use a reasonable approximation: we pretend the first update arrived instantly. If that were true, then we’d know the server time at that exact instant! We store the server timestamp in firstServerTimestamp, and we store our local (client) timestamp at that same instant in gameStart.
Woah, wait a second. Shouldn’t time on the server = time on the client? Why is there a distinction between the “server timestamp” and the “client timestamp”? That’s a great question, reader! Turns out, they aren’t the same. Date.now() will return different timestamps on the client and the server based on factors local to those machines. Never assume that your timestamps will be consistent across machines.
Now it’s clear what currentServerTime() does: it returns the server timestamp of the current render time. In other words, it’s the current server time (firstServerTimestamp + (Date.now() - gameStart)) minus the render delay (RENDER_DELAY).
Next, let’s understand how we’re handling game updates. processGameUpdate() is called whenever an update is received from the server, and we store the new update in our gameUpdates array. Then, to keep our memory use in check, we remove any old updates from before the base update, since we won’t need those anymore.
What exactly is the base update? It’s the first update we find when going backwards from current server time. Remember this drawing?
The game update immediately to the left of “Client Render Time” is the base update.
What’s the base update used for? Why can we throw away updates from before the base update? Let’s finally look at the implementation of getCurrentState() to find out:
// Header: state.js, Part 2
export function getCurrentState() {
  if (!firstServerTimestamp) {
    return {};
  }

  const base = getBaseUpdate();
  const serverTime = currentServerTime();

  // If base is the most recent update we have, use its state.
  // Else, interpolate between its state and the state of (base + 1).
  if (base < 0) {
    return gameUpdates[gameUpdates.length - 1];
  } else if (base === gameUpdates.length - 1) {
    return gameUpdates[base];
  } else {
    const baseUpdate = gameUpdates[base];
    const next = gameUpdates[base + 1];
    const r = (serverTime - baseUpdate.t) / (next.t - baseUpdate.t);
    return {
      me: interpolateObject(baseUpdate.me, next.me, r),
      others: interpolateObjectArray(baseUpdate.others, next.others, r),
      bullets: interpolateObjectArray(baseUpdate.bullets, next.bullets, r),
    };
  }
}
There are 3 cases we handle:
base < 0, meaning there are no updates before the current render time (see implementation ofgetBaseUpdate()above). This can happen right at the start of the game due to the render delay. In this case, we use the most recent update we have.baseis the most recent update we have (😢). This can happen because of lag or poor internet connectivity. In this case, we also use the most recent update we have.- We have an update both before and after the current render time, so we can interpolate!
All that’s left in state.js is the implementation of linear interpolation, which is just some simple (but boring) math. If you want to see it for yourself, look at state.js on Github.
Conclusion
You made it! That was the entire game client of an .io game distilled to its essentials.
In Part 2 of this series, we’ll switch to the backend and talk about to build an .io game server.
Have questions? Leave a comment below or tweet at me. Found a bug or spot a problem in my code? Submit an issue or PR to the example-.io-game Github repo.
Thanks for reading!